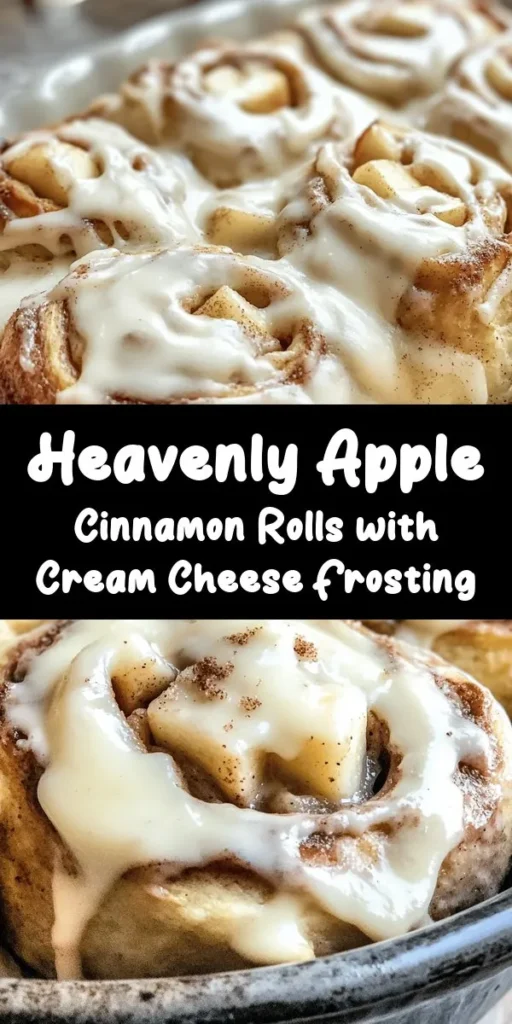
Introduction
Indulging in warm, homemade pastries is one of life’s simplest pleasures, and there’s nothing quite like the aroma of freshly baked apple cinnamon rolls wafting through your kitchen. This recipe for Irresistible Apple Cinnamon Rolls with Cream Cheese Frosting combines the tartness of Granny Smith apples, the warmth of cinnamon, and the richness of cream cheese frosting into a delightful treat that is perfect for breakfast, brunch, or any festive occasion. The combination of soft, pillowy dough filled with a luscious apple-cinnamon mixture and topped with creamy frosting makes these rolls a true showstopper.
The origins of cinnamon rolls can be traced back to Northern Europe, where they were originally enjoyed as a sweet breakfast treat. Over the years, variations of this beloved pastry have emerged, with countless fillings, frostings, and styles. Our version elevates the classic cinnamon roll by incorporating fresh apples, which not only add a burst of flavor but also a delightful moisture that keeps the rolls tender.
In this article, we will guide you through every step of the process, ensuring that your cinnamon rolls turn out fluffy, flavorful, and utterly irresistible. We will explore the essential ingredients, the science behind dough-making, and the crafting of the perfect apple-cinnamon filling, leading to the assembly of these delicious rolls.
Understanding the Ingredients
Exploring the Key Components of Apple Cinnamon Rolls
To create the best apple cinnamon rolls, it’s essential to understand the role of each ingredient in the recipe. Here’s a breakdown of the key components:
– Dough Ingredients: The foundation of any great cinnamon roll is its dough, which requires flour, sugar, yeast, salt, milk, butter, and eggs. Each of these ingredients plays a crucial role in creating the soft and fluffy texture that we all love. The flour provides structure, while the sugar adds sweetness. Yeast is the magical ingredient that allows the dough to rise, resulting in a light and airy roll. Salt enhances flavor and strengthens the dough, while milk and butter contribute to a rich flavor and tender crumb. Eggs add richness and help bind the ingredients together.
– Granny Smith Apples: For this recipe, Granny Smith apples are the star ingredient. Their tartness balances the sweetness of the sugar and cinnamon, creating a harmonious flavor profile. Choosing the right apples is critical; while other varieties may be sweeter, Granny Smith’s firmness holds up well during baking, preventing them from turning mushy.
– Brown Sugar and Cinnamon: The rich filling is created with brown sugar and cinnamon, which not only provide sweetness but also a deep, warm flavor that complements the apples beautifully. Brown sugar’s molasses content adds moisture and a slight chewiness that enhances the overall texture of the filling.
– Cream Cheese Frosting: Finally, the crowning glory of these cinnamon rolls is the cream cheese frosting. Its tangy creaminess contrasts perfectly with the sweetness of the rolls and adds a luxurious finish. Making your own cream cheese frosting allows you to customize the consistency and sweetness to your liking, ensuring that each roll is perfectly drizzled with just the right amount of frosting.
By understanding these ingredients and their roles, you’ll be well-equipped to create apple cinnamon rolls that are not only delicious but also a joy to make.
Preparing the Dough: The Foundation of Your Rolls
The Science Behind Dough Making
Creating the perfect dough is both an art and a science. The key to fluffy apple cinnamon rolls lies in understanding how yeast works and how to properly combine the ingredients. Here, we break down the dough-making process into manageable steps to ensure optimal results.
Importance of Yeast
Yeast is a living organism that ferments and produces carbon dioxide gas when it consumes sugar. This gas gets trapped in the dough, causing it to rise and creating that airy texture we all love in cinnamon rolls. It’s crucial to use fresh yeast to ensure proper fermentation, so always check the expiration date on the package.
Step-by-Step Breakdown of the Dough-Making Process
1. Activating the Yeast: Begin by activating your yeast. In a small bowl, combine warm milk (around 110°F or 43°C) with a bit of sugar and the yeast. Allow this mixture to sit for about 5-10 minutes until it becomes frothy. This step is essential as it confirms that the yeast is alive and ready to work its magic in your dough.
2. Combining Wet and Dry Ingredients: In a large mixing bowl, combine your dry ingredients: flour, remaining sugar, and salt. Make a well in the center and pour in the activated yeast mixture, along with melted butter and eggs. Using a wooden spoon or spatula, mix until the dough starts to come together.
3. Kneading for the Perfect Texture: Once the dough has formed, transfer it to a lightly floured surface. Knead the dough for about 8-10 minutes, adding small amounts of flour as necessary to prevent sticking. The goal is to develop the gluten, which gives the dough its structure and elasticity. You’ll know the dough is ready when it’s smooth and elastic, bouncing back when gently pressed.
4. Tips for Letting the Dough Rise Effectively: Place the kneaded dough in a greased bowl, cover it with a damp cloth or plastic wrap, and let it rise in a warm, draft-free environment. Ideally, you want the dough to double in size, which may take about 1-2 hours depending on the temperature and humidity of your kitchen. If your kitchen is on the cooler side, consider placing the bowl in a slightly warm oven (turned off) or near a heater to encourage rising.
By following these steps, you’ll create a dough that is the perfect base for your apple cinnamon rolls, resulting in a light and fluffy texture that everyone will rave about.
Crafting the Delicious Filling
Creating the Apple-Cinnamon Mixture
Now that your dough has risen, it’s time to craft the delicious filling that will take your cinnamon rolls to the next level. The combination of apples, brown sugar, and cinnamon creates a warm, inviting flavor that perfectly complements the soft rolls.
Choosing the Right Apples
When it comes to making apple cinnamon rolls, choosing the right type of apple is crucial. Granny Smith apples are the best option for several reasons:
– Tartness: Their natural tartness contrasts beautifully with the sweetness of the brown sugar, creating a balanced flavor.
– Firmness: Granny Smith apples hold their shape when baked, providing a pleasant texture without turning mushy. This is essential for achieving that delightful apple filling in your rolls.
Balancing Sweetness and Spice
To create the filling, you’ll mix diced Granny Smith apples with brown sugar and cinnamon. The brown sugar will caramelize during baking, enhancing the sweetness and flavor of the apples. Aim for a balance that suits your taste preferences; if you like a sweeter filling, you can always add a bit more brown sugar.
Optional Ingredients: Enhancing Flavor with Nuts
For an extra layer of flavor and crunch, consider adding chopped nuts to your filling. Walnuts or pecans complement the apple and cinnamon beautifully, adding a delightful texture contrast. If you choose to include nuts, simply fold them in with the apple-cinnamon mixture before spreading it over the dough.
How to Prepare and Mix the Filling
1. Preparation: Start by peeling, coring, and dicing your Granny Smith apples into small, even pieces. This ensures that they cook uniformly and distribute evenly throughout the rolls.
2. Mixing: In a medium-sized bowl, combine the diced apples with brown sugar, cinnamon, and any optional ingredients like nuts. Stir until the apples are well-coated in the sugar and spice mixture. This will create a flavorful filling that oozes out as the rolls bake, infusing the entire batch with apple-cinnamon goodness.
With your delicious filling prepared, you’re ready to assemble the rolls, bringing together the soft dough and the sweet apple-cinnamon mixture for a treat that will tantalize your taste buds.
Assembling the Rolls: From Dough to Delight
Step-by-Step Assembly Instructions
The final step before baking is to assemble your apple cinnamon rolls. This process not only brings the dough and filling together but also shapes the rolls for even baking and presentation.
1. Rolling Out the Dough: Once your dough has risen, turn it out onto a lightly floured surface. Using a rolling pin, gently roll the dough into a large rectangle, approximately 16 x 24 inches. Aim for an even thickness of about 1/4 inch. This size will allow you to create multiple rolls while ensuring each one is generously filled.
2. Spreading the Filling: After rolling out the dough, spread the apple-cinnamon mixture evenly over the surface, leaving about a 1-inch border around the edges. This border will help you seal the rolls once you start rolling them up.
3. Rolling Up the Dough: Starting from one of the long edges, carefully roll the dough away from you into a tight log. Make sure to keep the roll as tight as possible to prevent air pockets from forming. Once you reach the end, pinch the seam to seal it.
4. Cutting the Rolls: Using a sharp knife or a bench scraper, slice the rolled log into equal pieces, about 1.5 to 2 inches thick. You should have around 12-15 rolls, depending on how thick you cut them. Place the sliced rolls into a greased baking dish or a lined baking sheet, leaving some space between them to allow for rising during baking.
5. Second Rise: Cover the assembled rolls with a clean kitchen towel or plastic wrap, and let them rise in a warm place for an additional 30-45 minutes. This second rise is crucial for achieving the fluffy texture that we all love in cinnamon rolls.
Now that your apple cinnamon rolls are assembled and ready to rise, you’re just moments away from enjoying these fluffy, flavor-packed treats. In the next part of this article, we will delve into baking instructions, the secrets to achieving that perfect golden brown finish, and how to prepare the irresistible cream cheese frosting that tops these rolls to perfection. Stay tuned as we get closer to the sweet reward of enjoying your homemade apple cinnamon rolls!
Spreading the Filling: Ensuring Even Coverage for Maximum Flavor
Once your dough has risen and is ready to be rolled out, the next step is to spread the filling. This step is crucial for ensuring that every bite of your apple cinnamon rolls is packed with flavor. Start by turning your dough out onto a lightly floured surface. Using a rolling pin, gently roll the dough into a large rectangle, approximately 16×12 inches.
Now, prepare your filling mix by combining brown sugar, cinnamon, and softened butter. Spread this mixture evenly over the surface of the rolled-out dough, leaving about half an inch of space around the edges. This will help prevent the filling from spilling out when you roll it up.
Next, add the star ingredient: diced apples. Make sure to distribute the apples evenly across the filling. For the best results, use a mix of tart and sweet apples to create a balanced flavor profile. Granny Smith or Honeycrisp apples work exceptionally well. The key is to ensure that each section of the roll has its fair share of that delicious apple filling, enhancing the overall taste of your finished rolls.
Rolling and Slicing: Tips for Creating Uniform Rolls
After spreading your filling, it’s time to roll the dough. Starting from the long edge, carefully roll the dough away from you, keeping it tight but not overly so. A tighter roll will result in a more defined spiral when the rolls are sliced.
Once you’ve rolled the dough into a log, the next step is slicing. To ensure uniform rolls, use a sharp knife or a piece of unflavored dental floss. If you opt for the floss method, simply slide the floss under the dough log, cross it over the top, and pull to slice through without squishing the roll. Aim for slices that are about 1.5 inches thick. This size will allow for even baking and ensure that your rolls are fluffy and delicious.
The Second Rise: Why it’s Crucial for Achieving Fluffy Rolls
After slicing, place your rolls in a greased baking dish, ensuring they are spaced close together but not touching. This arrangement allows them to rise into each other, creating a soft and fluffy texture. Cover the rolls with a clean kitchen towel or plastic wrap and let them rise a second time for about 30 to 45 minutes, or until they have doubled in size.
This second rise is crucial for creating that airy, pillowy texture that we all love in cinnamon rolls. During this time, the yeast continues to ferment, producing carbon dioxide that causes the dough to expand. Skipping this step could lead to denser rolls, so be patient—your efforts will be rewarded!
Baking the Rolls: Achieving Golden Perfection
The Baking Process Explained
Once your rolls have completed their second rise, it’s time to bake. Preheat your oven to 350°F (175°C). Proper temperature control is essential for achieving optimal results. A well-preheated oven ensures that the rolls begin baking evenly right from the start, allowing for a beautifully golden crust.
Baking Time and Techniques for Checking Doneness
Place your baking dish on the middle rack of the oven and bake the rolls for about 25 to 30 minutes. Keep an eye on them as they bake; you want them to turn a lovely golden brown. To check for doneness, you can gently tap the top of a roll. If it sounds hollow, they are likely ready. Alternatively, you can use a digital thermometer to check the internal temperature, which should reach around 190°F (88°C) when fully baked.
The Science Behind Achieving a Golden-Brown Crust
The golden-brown crust of your cinnamon rolls is a result of the Maillard reaction, which occurs when amino acids and sugars react under heat. This not only gives your rolls a beautiful color but also adds depth of flavor. For an extra touch, you can brush the tops with melted butter before baking to enhance browning and add richness.
Making the Cream Cheese Frosting
Ingredients Breakdown: Cream Cheese and Butter for Richness
While your rolls are baking, it’s the perfect time to whip up the cream cheese frosting that will take your apple cinnamon rolls to the next level. For the frosting, you will need:
– 8 oz cream cheese, softened
– 1/2 cup unsalted butter, softened
– 2 cups powdered sugar
– 1 tsp vanilla extract
– A pinch of salt
The combination of cream cheese and butter provides a rich, creamy texture that pairs perfectly with the sweetness of the rolls.
Step-by-Step Instructions for Achieving a Smooth Consistency
1. In a medium mixing bowl, beat the softened cream cheese and butter together with an electric mixer until smooth and creamy, about 2 minutes.
2. Gradually add the powdered sugar, mixing on low speed until incorporated, then increase the speed to medium until smooth and fluffy.
3. Add the vanilla extract and a pinch of salt, mixing until well combined. If your frosting seems too thick, you can add a teaspoon of milk at a time until you reach your desired consistency.
How to Adjust Frosting Thickness for Personal Preference
If you prefer a thicker frosting, simply add more powdered sugar until you reach your desired consistency. Alternatively, if you like your frosting a bit thinner, adding a small amount of milk will help achieve a drizzle-able texture. Keep in mind that the frosting will set slightly once applied to the warm rolls, so aim for a slightly thicker consistency if you plan to frost them right after baking.
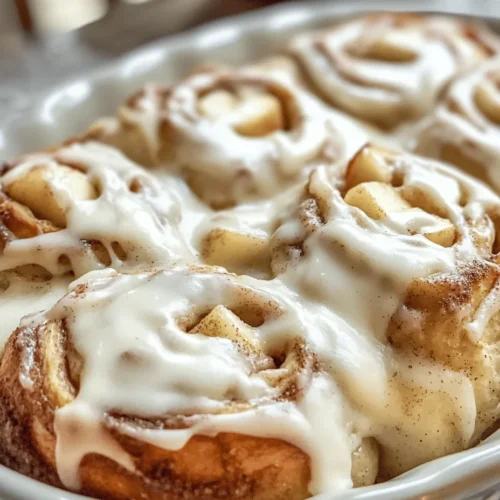
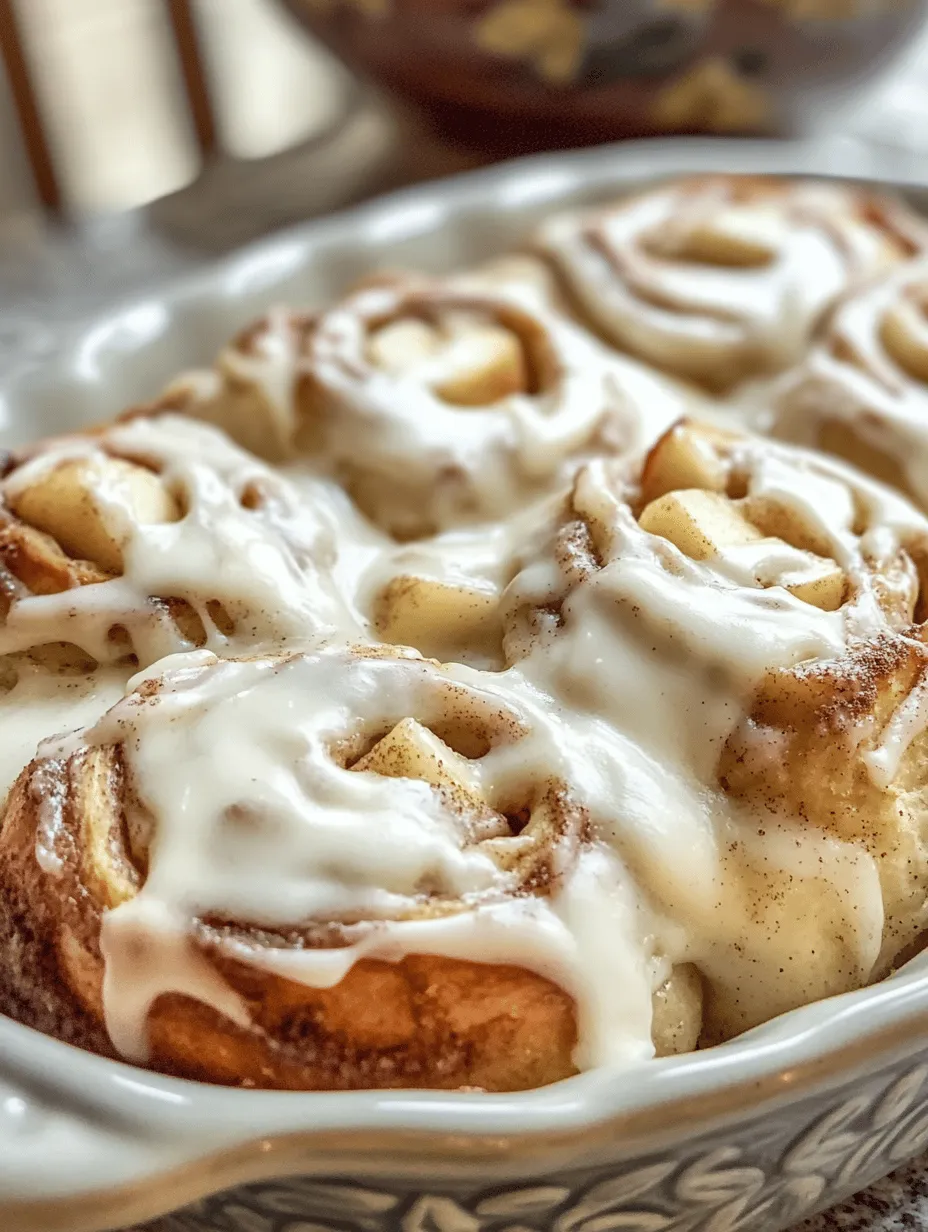
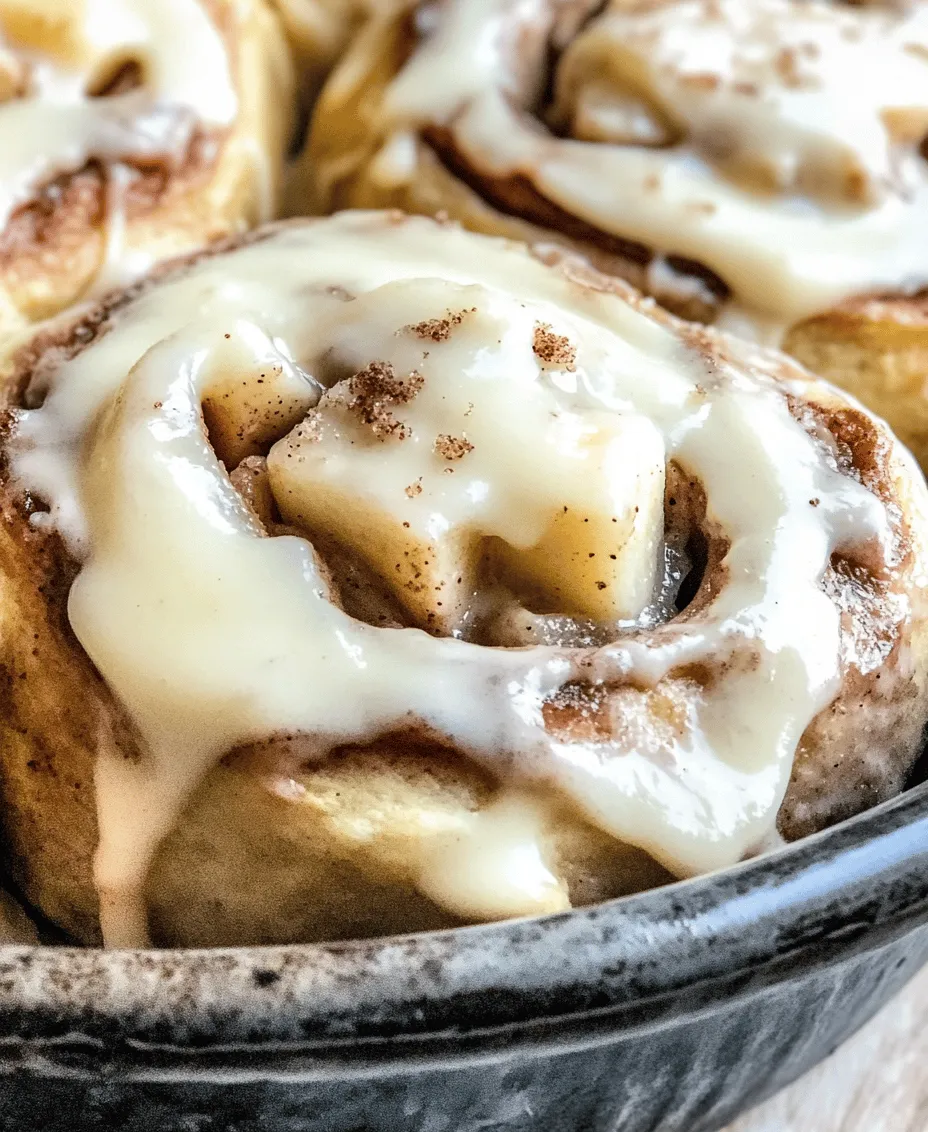
Frosting the Rolls: Adding the Finishing Touch
Best Practices for Applying Frosting to Warm Rolls
Once your rolls are out of the oven and slightly cooled (about 10 minutes), it’s time to frost them. Applying the cream cheese frosting while the rolls are still warm allows the frosting to melt slightly, creating a delicious glaze that seeps into the rolls.
Using a spatula or a butter knife, spread the frosting generously over the top of the rolls. If you want a more decorative touch, use a piping bag fitted with a large round tip to pipe the frosting on top for a beautiful finish.
The Visual Appeal: Creating a Beautiful Presentation
To elevate the presentation, consider garnishing your frosted rolls with a sprinkle of ground cinnamon or finely chopped nuts, such as pecans or walnuts. This not only adds visual interest but also complements the flavors of the rolls beautifully.
Tips for Serving and Enjoying Your Freshly Baked Rolls
Serve your apple cinnamon rolls warm, alongside a cup of coffee or tea for a delightful breakfast or brunch treat. They also make a wonderful dessert, especially when paired with a scoop of vanilla ice cream.
Storage and Reheating Suggestions
Proper Storage Methods to Maintain Freshness
To keep your freshly baked apple cinnamon rolls at their best, store any leftovers in an airtight container at room temperature for up to two days. If you want to keep them longer, refrigerate them for up to a week. Just be aware that refrigeration can dry them out slightly, so be sure to cover them well.
Reheating Techniques for Optimal Taste and Texture
When you’re ready to enjoy your leftover rolls, preheat your oven to 350°F (175°C). Place the rolls on a baking sheet and cover them loosely with foil to prevent over-browning. Heat for about 10-15 minutes, or until warmed through. For a quicker option, you can microwave individual rolls for about 15-20 seconds, but be cautious not to overheat them, as this can make them tough.
How to Freeze Rolls for Later Enjoyment
If you want to prepare these delicious rolls in advance, you can freeze the unbaked rolls before the second rise. Simply slice the rolls and place them on a baking sheet lined with parchment paper. Freeze until solid, then transfer them to a freezer-safe bag. When you’re ready to bake, take them out, place them in a greased baking dish, cover, and let them rise for about 1-2 hours before baking as usual.
Conclusion
There’s something truly special about creating your own Apple Cinnamon Rolls with Cream Cheese Frosting. The process not only fills your home with an irresistible aroma but also provides a rewarding culinary experience that can be shared with loved ones. With this comprehensive guide, you now have the tools and knowledge to create these delightful rolls from scratch, ensuring that each bite is a delicious reminder of why homemade treats are always worth the effort. Enjoy your baking journey and the delightful results that follow!